To access the preferences, launch HexWeb Index and select Preferences... from the File menu. This will open the Preferences dialog.

GENERAL PREFERENCES

Author/URL:
In these fields you can put the name of the author and the URL of your publication. They will appear in the end of the table of contents file as a hyperlink.When this checkbox is selected, HexWeb Index will create a FRAMES interface index for the directory selected. If not selected, the table of contents will be created as an HTML List.
Read more about FRAMES in the FRAMES section of this manual.
When this checkbox is selected, Netscape will be opened automatically and the table of contents will be shown once the index has been created.
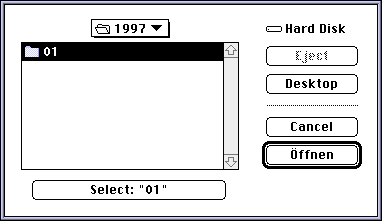
After launching HexWeb Index, the program prompts you via a dialog where you define the folder you wish to index.

![]()
This option chains the HTML documents inside one category, so that you can jump to the next or previous article listed in the table of contents.
Here is an example of a header of a web page from The Detroit News with the navigation buttons:

The source code for the navigation buttons in your header files should look equal to this example from the Detroit News:


You can of course also use the navigation buttons also in your footer files:
When this option is selected, HexWeb Index creates an external file where all the settings from the last indexing are saved. It also shows a preview of the index, where you can resort the articles.
![[InlineGrafix-9.gif]](InlineGrafix-9.gif)
FRAMES is explained in a special section of this manual.
ALARM
ALARM
In this preference you can define the settings of how HexWeb Index notifies you of a successful or unsuccessful index operation.

LAYOUT
In the Layout preferences you can create an individual look for your table of contents.
The Indexheading text is editable and variables for year, month, date and time are available.
You can choose between different list types or make your own list definition by using "Custom" settings:


CATEGORIES
CATEGORIES
![[InlineGrafix-12.gif]](InlineGrafix-12.gif)
HexWeb Index sorts categories alphabetically as a default. However, you can manually change the sort order in this preference by dragging the categories in the list.
You can edit the categories by double clicking the names in the list or create a new category by clicking the "Add" button.
The delimiter between layers is the character between the category names
in the Category frame when you are using FRAMES.
![[InlineGrafix-13.gif]](InlineGrafix-13.gif)

To be able to have a category heading, either an image e.g. "News.gif" or text, you should edit the categories so, that their names are equivalent to those used in XPress or CopyDesk with HexWeb XT.
NOTE: Folder names created by HexWeb XT will have been shortened and stripped of offending characters so that the filenames will work on any platform.
VARIABLES
VARIABLES
Here you should define the location of the $ROOT: and $HOME: directories. The paths are needed to show the LinkCheck the relative location of all files. Click "Browse" to select the folders. $HOME: is in this example the "Archive" folder, which you already defined as MainPath for HexWeb XT in QuarkXPress or CopyDesk.
The $ROOT: folder can be any folder above $HOME: folder. This would be the main folder on your Web Site. Select the "HexWeb XT folder" as the $ROOT: folder in this example.
The datestamp variable "$DATE:" can also be defined here.

EXPERT
EXPERT
![[InlineGrafix-14.gif]](InlineGrafix-14.gif)
In this dialog, you can set background colors, headers and footers and other HTML commands for your tables of contents. It is recommended that only users who are familiar with HTML make changes in this dialog. The buttons on the right side are shortcuts for variables, which you can use in the headers and footers.

Headers and Footers
Headers and Footers

If you wish to use external header and footer files in your indexes, e.g. making an individual look for each category index, you can use them by dragging the HTML files in this dialog.
They will then be visible in the PopUps when creating an index document.
NOTE: All variables, $HOME:, $DATE: and $TIME: are supported and parsed from the header and footer files.

The next section will explain about Frames.